Who would think that making Vegan Soy Yogurt is as simple as putting two ingredients together? Not only is this homemade vegan yogurt recipe easy and delicious, but the amazing health benefits of eating live active cultures are phenomenal!
What you need to Make Vegan Yogurt:
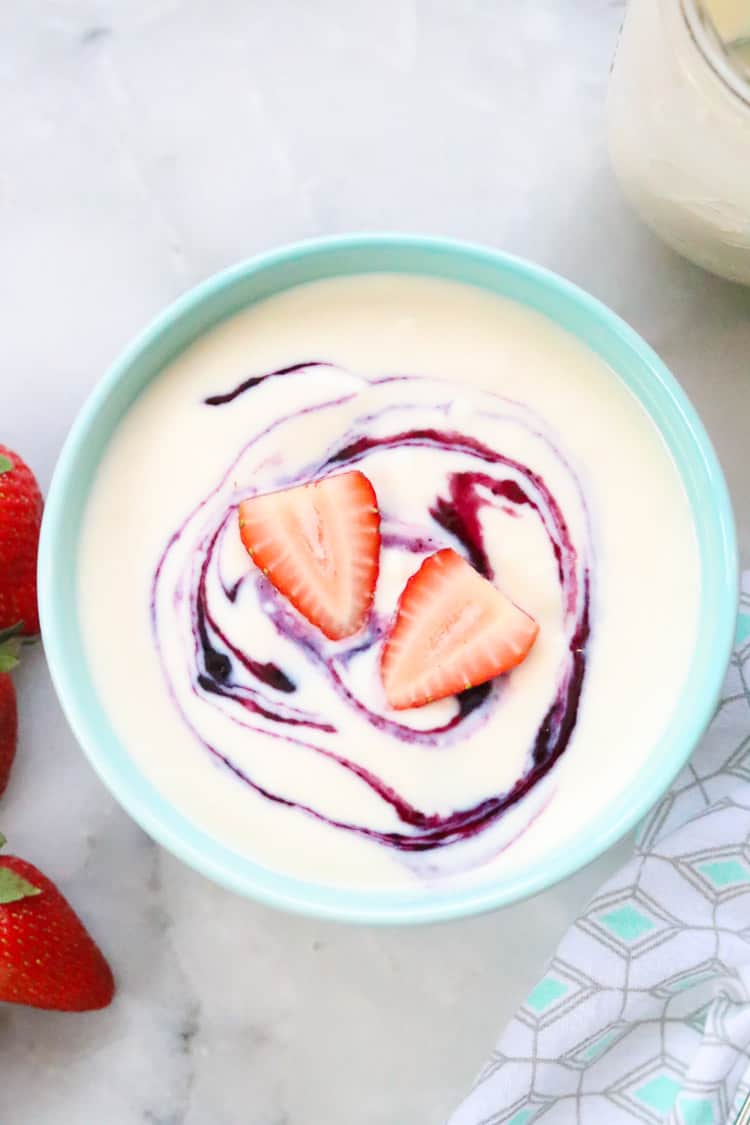
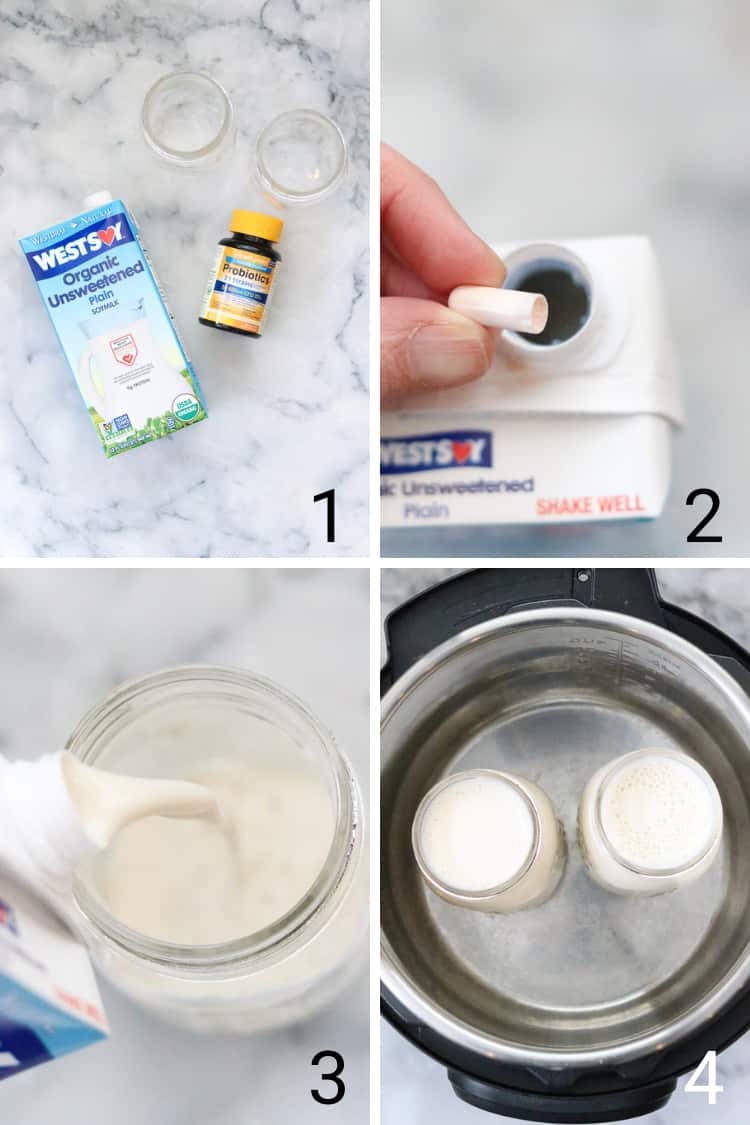
- Pure Soy Milk - it must have ONLY two ingredients, Water and Soybeans. Trader Joe's and WestSoy are both high in soy protein content and work great. Not all stores carry plain 2-ingredient soy yogurt, but you can get the WestSoy yogurt on Amazon directly from the manufacturer.
- Instant Pot (with yogurt function) - having a VERY low consistent heat is essential to predictable outcome. I'm guessing since you're reading this, you already have an Instant Pot, but just in case you don't... this is the Instant Pot I have, it has a yogurt function. Homemade yogurt miiiight be the main reason I got an Instant Pot!
- Vegan yogurt starter - this can be soy store-bought yogurt such as SILK yogurt, Non-Dairy Yogurt Cultures, or Probiotic Capsules.
How to Make Vegan Yogurt - 3 Easy Ways:
#1) Store-bought yogurt as vegan yogurt starter -
Measure 1 Tablespoon of store-bought soy yogurt into the bottom of two glass pint jars. Pour pure soy milk into jars and stir until mixed very well.
Place jars into instant pot and turn on yogurt setting for 12-14 hours. Refrigerate yogurt for 8+ hours to further thicken, and enjoy!
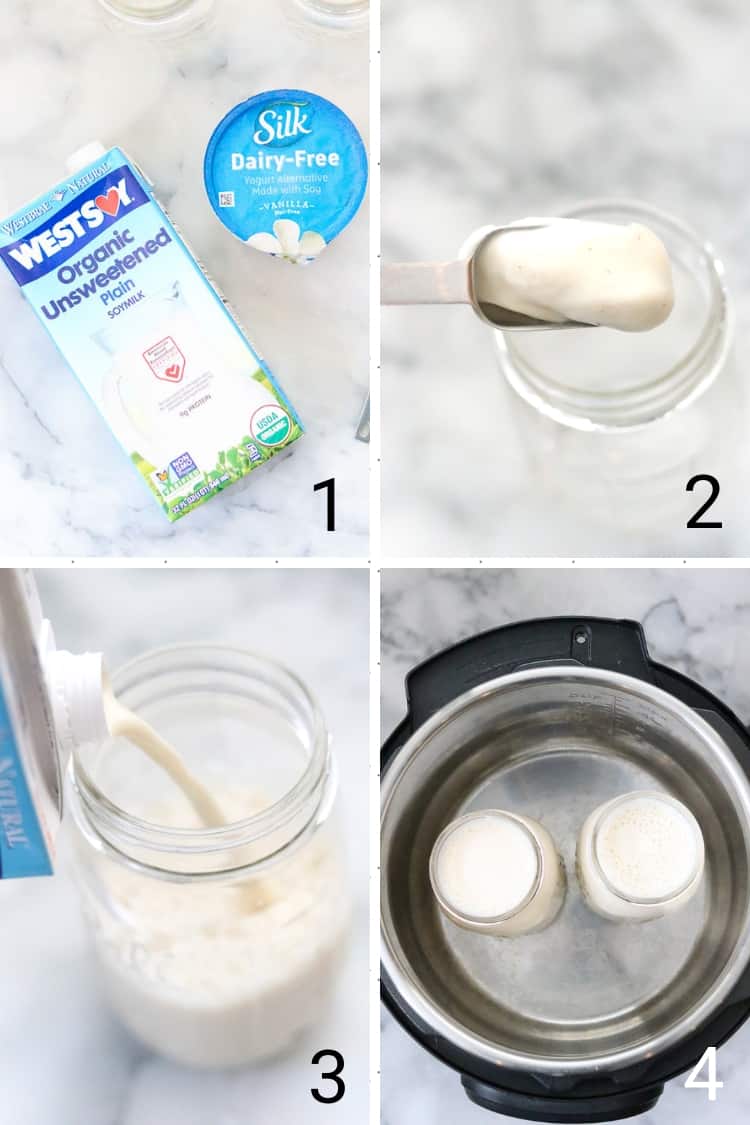
#2) Non-dairy yogurt cultures as vegan yogurt starter -
Take 1 packet of Real Yogurt Starter (or equivalent amount of other non-dairy yogurt starter) and pour it into 1 quart of pure soy milk. Replace the cap and shake well.
Pour mixture into two pint jars and place in the instant pot on yogurt setting for 12-14 hours. Refrigerate yogurt for 8+ hours to further thicken, and enjoy!
#3) Probiotic Capsules as vegan yogurt starter:
Empty contents of one probiotic capsule (25 Billion CFU) into one quart of pure vegan soy milk. Replace cap and shake well.
Pour mixture into two glass pint jars and place in the Instant Pot on the yogurt setting for 12-14 hours. Refrigerate yogurt for 8+ hours to further thicken, and enjoy!
Vegan Yogurt Starters
For those of us who don't always have access to store-bought yogurt, or might be allergic to certain additives, the vegan yogurt starters are great! They have a long shelf life and are always there when you are craving yummy homemade yogurt!!
Here are Amazon links to two different kinds I've used with success:
Probiotic Capsules as Starter
The ratio of probiotics to soy milk is important, as well as the type of probiotics used. The brand I've used with success is sold on Amazon New Rhythm Probiotics. All you need is one capsule!
If you try a different brand, you’ll want to make sure you use 25 billion CFU of probiotics per quart of soy milk. Check the label of your probiotics to determine how many capsules are needed to equal 25 billion—the probiotics will be labeled with the CFU per serving but sometimes it takes more than one capsule to equal a serving.
Also, be sure to keep your probiotics in the refrigerator. Over time the probiotics can become more or less effective and are especially susceptible to any kind of heat.
What is homemade Vegan Yogurt like?
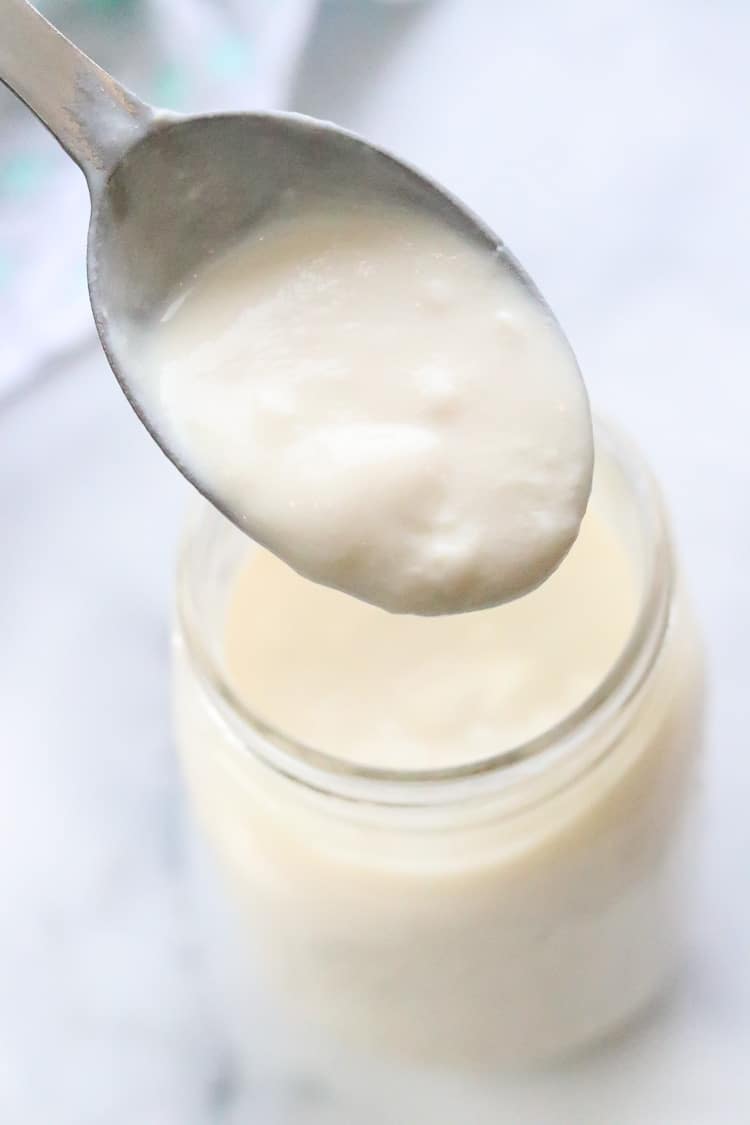
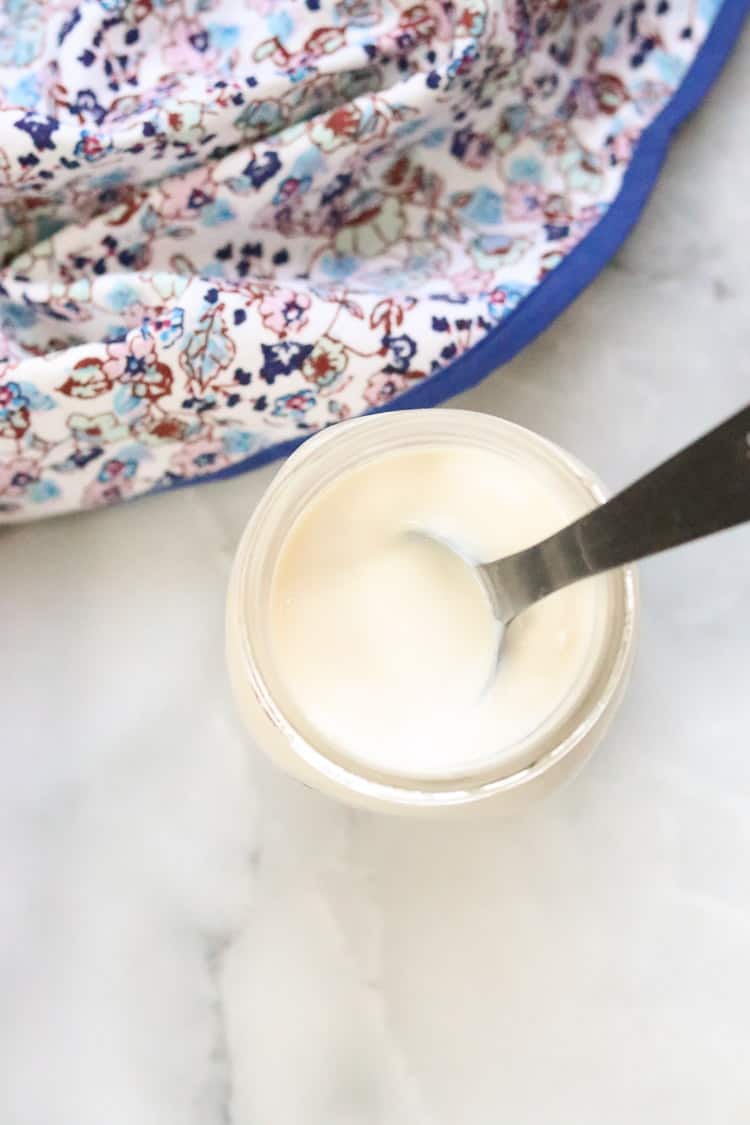
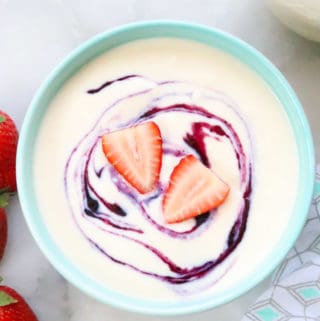
After refrigerating until well chilled, (at least 6 hours or preferably 12 hours so that the flavors and texture can really have a chance to develop) you will have a rich, creamy, tangy yogurt that is the consistency of a thicker drinkable yogurt.
You can strain the yogurt to make it thicker - just place a double layer of Bounty paper towels in a large colander and carefully pour the yogurt into the paper towel. Allow to drain into a bowl for anywhere between ~1-4 hours, depending on how thick you want your yogurt. Use a spoon to gently transfer the strained yogurt back into the jars.
I actually prefer using paper towels instead of a cheesecloth for straining yogurt because it does not get stick in the paper towel at all!

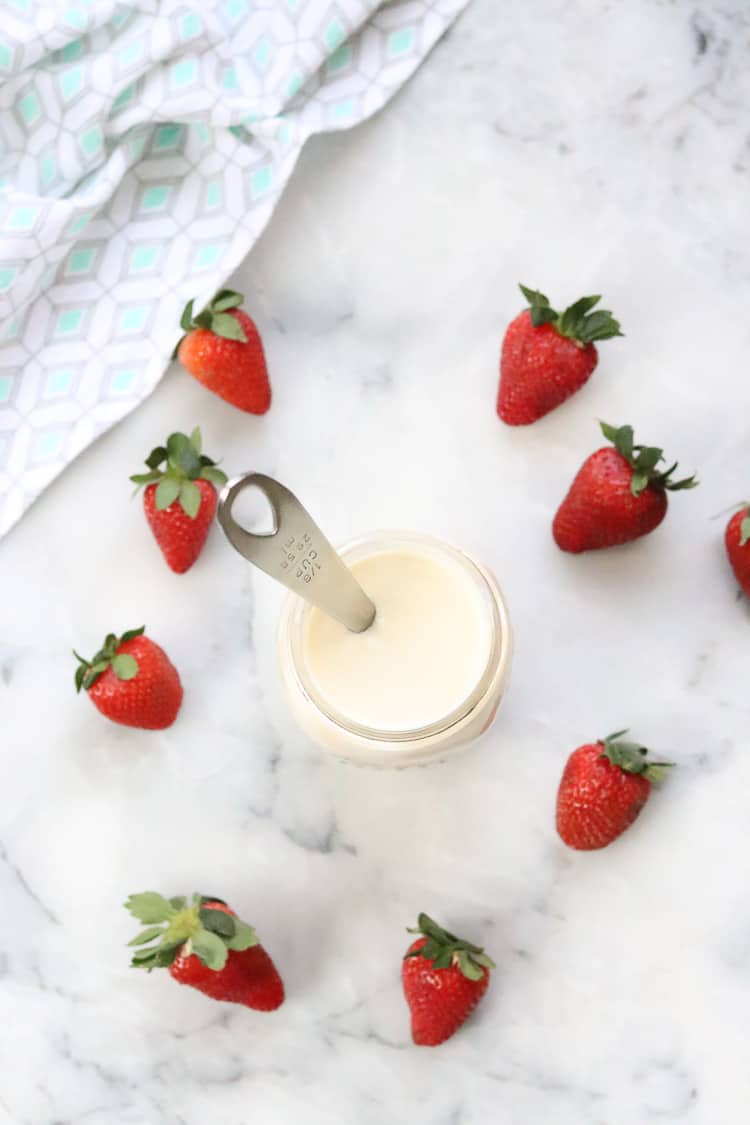
What you can do with Vegan yogurt:
- Eat it sweet:
- Swirl in this simple berry sauce
- Drizzle it with lots of vegan chocolate sauce
- Favorite Jam mixed in
- Agave or syrup added
- Piled high with fruit and vegan granola
- In vegan parfaits
- In smoothies
- Eat it savory/plain:
- Use it in Vegan Salad Dressings
- Add it to a cream soup, such as this vegan miso sweet potato soup
- Creamy Pasta recipe base
- Cook or bake with it

Vegan yogurt making tips and tricks:
Make your own Vegan Yogurt Starter:
Save just a couple of tablespoons from each batch of yogurt and that can be the starter for your next batch! After more than three rounds of this, your culture may become dilute, so just start fresh after that.
Making your own vegan yogurt starter is another way to save!
Free up your Instant Pot by making your yogurt at night:
Make your yogurt starting in the evening making sure it will run through whenever is convenient for you the next morning to pull it out and put it in the fridge. 12 hours is the minimum, but you can run it longer if you like it tangier.
Or... have your yogurt ready for breakfast
Use the Instant Pot during the day to make the yogurt, then place it in the refrigerator overnight. It will be ready for breakfast!
For thicker Greek-style vegan yogurt:
You can strain the yogurt to make it thicker - just place a double layer of Bounty paper towels in a large colander and carefully pour the yogurt into the paper towel. Allow to drain into a bowl for anywhere between 1-4 hours, depending on how thick you want your yogurt. Use a spoon to gently transfer the strained yogurt back into the jars.
I actually prefer using paper towels instead of a cheesecloth for straining yogurt because it does not get stick in the paper towel at all!
Why I use the jars:
You can make your yogurt right in the instant pot, but besides the fact that people say the metal in the pan can cause problems with the culture growth, jars are just plain easier. Make it in the jar, culture it in the jar, chill it in the jar, store it in the jar, eat it in the jar.... Yeah you get the idea. Simple, clean, and sterile. And less dishes!!!
Please note: This recipe is only for making vegan soy yogurt. Other non-dairy milks require different steps.
Can I use a Slow Cooker to make this vegan yogurt?
I have made vegan yogurt in a slow cooker or rice cooker with some success on the 'keep warm' or 'warm' setting. However, too much heat will kill the live active cultures and the yogurt will not thicken properly. So this is a bit of a tricky business. If you still want to try it, here are a few tips.
If you are using a Slow Cooker or Crockpot, line the bottom of the crockpot with at least two thick doubled up dish towels. Place filled jars on top of it and leave the lid off of the slow cooker.
You can cover with a paper towel or something but you need to let the heat out, otherwise it will get too hot and kill the cultures!! Turn the temp to 'warm' and set yourself a timer for 12 hours.
Follow the chilling directions above!!
Other vegan recipes you will love:
- Easy Breakfast Tofu Scramble
- The Ultimate Green Smoothie
- Cocoa Banana Chia Seed Pudding
- 2 Ingredient Banana Oat Cookies
If you’ve tried this Vegan Yogurt Recipe or any other recipe on my blog then don’t forget to rate the recipe and let me know how you got on in the comments below, I LOVE hearing from you! You can also FOLLOW ME on FACEBOOK, INSTAGRAM and PINTEREST to see more delicious food!!!
Did you make this recipe?? Click on the stars below to give it a rating!!!
Recipe
Easiest Vegan Soy Yogurt
Ingredients
- 1 quart Plain Soy Milk , (Must have only two ingredients-soybeans and water! I use WestSoy and Trader Joe's Brands)
- 2 Tbsp. Commercial Vegan Soy Yogurt , (Coconut yogurt, almond etc. DO NOT WORK. I use Silk Soy Yogurt)
- OR 1 Packet Vegan Yogurt Starter such as Bella and Bella or vegan REAL Yogurt by Cultures for Health
- OR the contents of One 25 Billion CFU Probiotic Capsule, such as New Rhythm
Special equipment
Instructions
- Grab two clean pint jars.
- Measure 1 tablespoon Commercial Vegan Soy Yogurt (no subs.) into the bottom of each pint jar. Pour Plain Soy Milk (also no subs.) to fill both pint jars evenly. Mix well. OR FOLLOW STEP 3 BELOW FOR USING YOGURT STARTER OR PROBIOTIC CAPSULE
- OR Pour 1 packet Vegan Yogurt Starter OR dump the contents of 1 Probiotic Capsule (25 Billion CFU) into 1 Quart Plain Soy Milk. Shake well!!! Pour into the two pint jars
- Place both jars in clean Instant Pot, close instant pot lid and vent and turn on Yogurt setting for 12+ hours*
- When yogurt has finished culturing, remove jars (do not stir!!) and place in Refrigerator for 6-12 Hours. Now serve your amazing yogurt with fruit syrup or jam mixed in for sweetener or use plain in cooking/baking!!
Recipe video
Notes
Vegan Yogurt Making TIPS and Tricks:
Make your own Vegan Yogurt Starter: Save just a couple of tablespoons from each batch of yogurt and that can be the starter for your next batch! After more than three rounds of this, your culture may become dilute, so just start fresh after that. Making your own vegan yogurt starter is another way to save! Free up your Instant Pot by making your yogurt at night: Make your yogurt starting in the evening making sure it will run through whenever is convenient for you the next morning to pull it out and put it in the fridge. 12 hours is the minimum, but you can run it longer if you like it tangier. For thicker Greek style vegan yogurt: You can strain the yogurt to make it thicker - just place a double layer of Bounty paper towels in a large colander and carefully pour the yogurt into the paper towel. Allow to drain into a bowl for anywhere between 1-4 hours, depending on how thick you want your yogurt. Use a spoon to gently transfer the strained yogurt back into the jars. I actually prefer using paper towels instead of a cheesecloth for straining yogurt because it does not get stick in the paper towel at all! Why I use the jars: The metal in the pan can cause problems with the culture growth and jars are just plain easier - less dishes! Please note: This recipe is only for making vegan soy yogurt. Other non-dairy milks require different steps.Can I use a Slow Cooker to make this vegan yogurt?
I have made vegan yogurt in a slow cooker or rice cooker with some success on the 'keep warm' or 'warm' setting. However, too much heat will kill the live active cultures and the yogurt will not thicken. So this is a bit of a tricky business. If you still want to try it, here are a few tips. If you are using a Slow Cooker or Crockpot, line the bottom of the crockpot with at least two thick doubled up dish towels. Place filled jars on top of it and leave the lid off of the Slow cooker. You can cover with a paper towel or something but you need to let the heat out, otherwise it will get too hot and kill the cultures!! Turn the temp to 'warm' and set yourself a timer for 12 hours. Chill vegan yogurt for 6-12 hours and enjoy!Nutrition


Hannah
This seems like a really silly question but I simply cannot find the answer! Are the jars submerged in water? If so, how much?
Rebecca
Thanks for the question. It's totally valid. No water needed!
Donna Hartnett
How do you sterilize the jars?
Rebecca
Just wash them really well. Basically you don't want to be growing any unwanted bacteria!
Chevjon
Would this work with 4 half pint mason jars? I only have quart jars and half pint jars on hand and way to eager to wait until tomorrow to make this. ?
Rebecca
Sure! It'll work great with half-pint jars. Honestly, I often make several recipes at a time and manage to squeeze three quart jars in my instant pot at a time. I takes some careful lid positioning, but it works! Have fun!
Meredith
Thanks, I'll give that a try! I think I have a thermometer somewhere, and I read that you need to keep it between 110 and 115, so I'll be sure to check it if I give that a try.
Meredith
Thanks! I don't think my cultures are too old. I bought the Belle+Bella nondairy starter at the beginning of October from Amazon, but I'll check the expiration date just in case. I'll try warming up the soy milk first next time. I think I'm going to save a little from today's batch and use that as starter to see if it makes a difference. Should I add the starter before or after I warm the milk?
Rebecca
I've bought that from Amazon before as well and used with success. I do try to keep my cultures in the refrigerator to help preserve their shelf life as well, but you haven't had it long so sounds like it should be fine either way. If you warm the milk, keep the temp super low. I usually start off with room temp if possible but slight warming would be fine. You can add the starter and the cultures before warming as long as you're careful not to overheat and kill them! I think the main thing I would do in your situation is process longer, keeping an eye on things every couple hours after the 12 hour mark if possible.
Meredith
I tried to make this using plain Westsoy Organic Unsweetened soy milk and the Belle & Bella starter. Unfortunately, it turned out very thin and not very tangy both times I made it. On the Belle & Bella nondairy starter package, it says to use sweetened yogurt, but I used unsweetened because every recipe I've found says to use unsweetened for the higher protein content to get thicker yogurt. Every recipe says the ones with added thickeners that aren't just soy beans and water wind up clumpy. However, I wonder if there's not enough to feed the cultures without any sweetener?
Alternatively, I'm wondering if this is because I didn't vent the pot. The model Instant Pot that I have automatically sets the seal unless I manually turn it off. I didn't see that step in other recipes, but it's possible they don't have the same model and that theirs is already set to vent. Next time, I'll try that and see what happens.
Any other suggestions?
Rebecca
Venting or not venting your IP should not make any difference. I have done it both ways without differing results. Try letting it process a few hours longer. Are you starting with cold milk? That can make it take longer. It may be that your cultures are a bit older and not as active. You can try adding more. But first I would make sure to mix well and then run your IP for at least a few hours longer. Check at that point, and then add longer time if necessary. Up to 24 hours is fine... Remember to chill to thicken further. Hope that helps!
Sabrina Oesterle
Wow! This is so good! I have never made soy yogurt before. This was my first try and it came out amazing. Absolutely amazing! What a great start to my vegan life!
I used the crock pot method, but with a small variation. As you suggested, I lined the crock pot with towels and used the warm setting, covering the jars only with a paper towel. But I was afraid it was still getting too hot (it got up to about 109 degrees, I think). So I turned it off after only about 3 hours, wrapped the ceramic insert with the yogurt glasses in it in a big bath towel and put it in the oven. I left it there for about 12-13 hours, then put the glass jars into the fridge (without stirring or anything) for another 7-8 hours. Done. Perfect yogurt. 🙂
Rebecca
Thanks for your comment! You're def a natural at this! So glad everything came out perfect. Your idea to just turn it off and keep it warm was perfect. Others have also experimented with a rice cooker on a keep warm setting and have done well. Just super low heat is all that is needed! Great job!
Ellen Tomao
The store bought silk yogurt....plain unsweetened? Or vanilla regular (sweetened)? Could you clarify which one you use? Thank you!
Rebecca
I use the silk brand but any of the flavors or unflavored work fine. Because you are using so little, you shouldn't really be able to taste it no matter what flavor you use!
Jason Thomas
Quick question for clarification, I assume when you put them in the jars and then put them in the instant pot that you DON'T put lids on them? They're open in the instant pot?
Rebecca
Correct! No need to have lids on the jars in the inside the instant pot!
Tish
I love this yogurt. I use it everyday to top my oatmea. I make 2 quarts because 4 pint jars fit in my instant pot. I make it overnight. Do you cover the jars inside the instant pot? My conventional yogurt maker uses snap on lids.
Rebecca
So glad you love it! I don't cover the jars while inside of the instant pot. I do however put lids on when I transfer the jars to the fridge....